Part two on preparing a wood panel for painting with the application of chalk grounds and the sixth in our technical series on painting icons, this article discusses preparing the glue solution used in the preparation of wood panels for tempera painting— size, pavoloka, and gesso—since the earliest Christian period until today. While the series specifically applies to making icon boards and preparing them for painting egg tempera icons, it has application to preparing wood panels for painting in any medium on chalk grounds.
An icon board with braces and kovcheg (recessed area) can be considered finished only after it is sized, pavoloka glued onto its surface, and the ground applied. Sizing involves impregnating the board with a solution of gelatin or glue. The purpose of sizing the board is to provide a reliable bond between the ground and the surface of the board. Wood, from which the icon board is prepared, and chalk, which is the primary component of the ground, are entirely different materials. A natural bond between them is practically impossible. Yet glue, penetrating between the fibers of wood, forms a reliable bond since the size and ground use the same material.
Preparing the Panel Surface
Before describing the preparation of the board with glue size, let's consider an operation that is beneficial to accomplish before sizing. This operation consists of making incisions on the front surface of the panel to give it roughness. These incisions improve the bond between the glue layer and the board. This operation is not mentioned in medieval painting manuals. The first references to it are found in manuals at the beginning of the 19th century. The reason for this is simple, as was discussed in previous articles, woodworkers in medieval Rus' split logs to make icon boards. After splitting the logs, a billet was further processed with an adze (Fig. 1). Boards made in this manner were not very smooth and had characteristic notches and gouges on the surface. These gouges gave the board's surface roughness that fulfills the same function as incisions. Therefore, there was no need to create a rough surface on the front of the painting panel in medieval times, hence the absence of any description of this operation in ancient references.

Fig. 1. An adze used to shape medieval boards from split wood.
Since the 19th century, boards have been manufactured using woodworking machines that give surfaces a smooth finish. Hence, it is necessary to make incisions on the board's surface; otherwise, the ground may not adhere well to the wood. Incisions can be made more accessible with a unique tool called a scriber, which is not difficult to make at home or in a workshop. All that is necessary is a long wood block, and a section from a metal hack saw blade. The blade's dull edge is driven into one end of the block, so the serrated edge protrudes from the end of the wood block (Fig. 2).

Fig. 2. A scriber to make incisions on the face of painting panels.
To scribe a panel, make incisions with the scriber along the grain of wood over the entire front surface of the board. Without a scriber, such as described above, make shallow cuts to a depth of 0.3–0.5 mm (less than 0.02 inch) with a scalpel or scratches using an etching needle. It is not necessary to make the cuts extremely close to one another; a distance of 3–5 mm (0.12–0.20 inch) between adjacent incisions is sufficient. However, avoid intersecting the incisions and do not make them closer than 2 mm (0.08 inch) apart since this can lead to chipping the wood surface.
Making Glue Size
After making the incisions on the board, you are now ready to begin sizing it. First, it is necessary to prepare the glue solution. In all stages of laying glue on the board, beginning with the size, use the same glue, but in the different layers, use different concentrations of the glue solution.
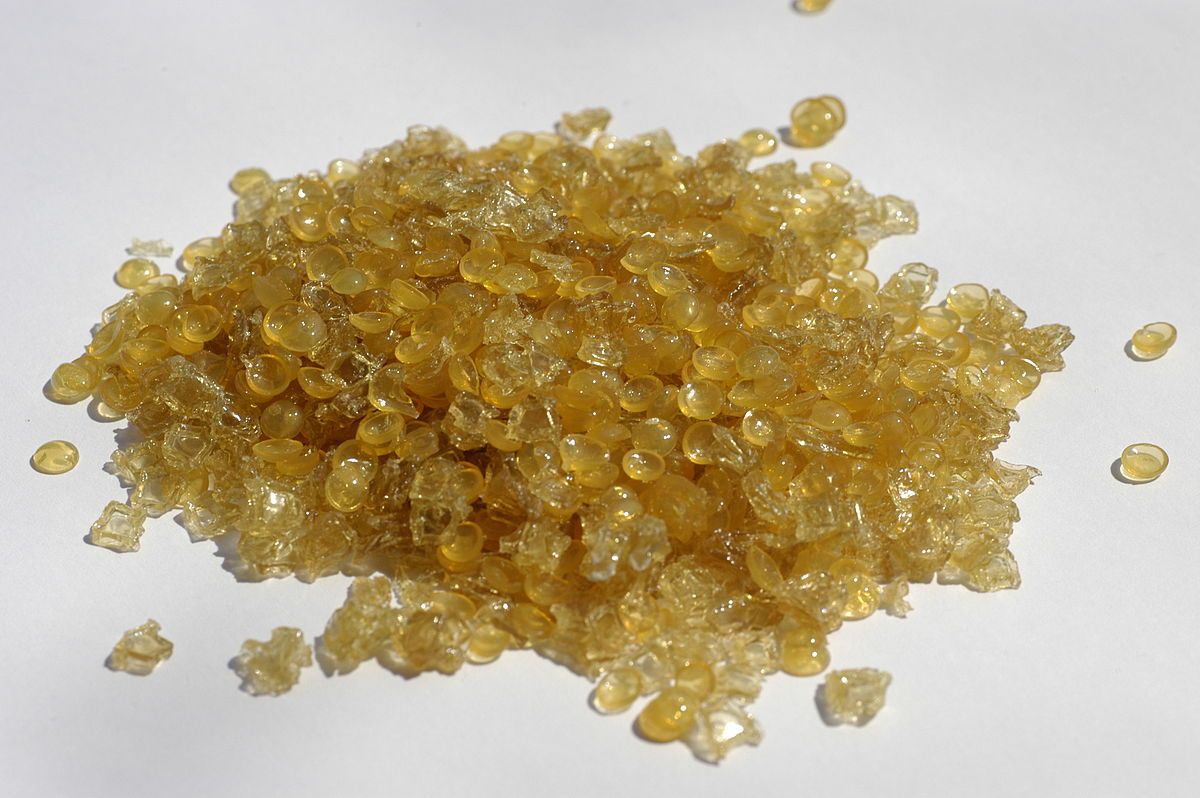
To prepare the glue solution, you will need water, dry glue, and a glue pot, such as a double boiler or "water bath," as described in the previous article. The water used to dissolve the glue must not be complicated. Excessive mineral salts do not substantially affect the performance of the size but are undesirable in the preparation of the ground since they can subsequently cause cracking. Use softened water, distilled water, rainwater, or water from melting snow for the best results. It is best to use collagen glue, such as sturgeon glue (isinglass), rabbit skin glue, or high-quality hide glue. Collagen glue is readily available, so there is no need to prepare your own. You may find hidden glue preparations in liquid form sold in hardware stores or supermarkets. This type of glue is not worth buying since very frequently, and it is prepared with other substances that substantially alter its adhesive qualities, thereby reducing its effectiveness for this purpose. Obtain dry glue free of contaminates, such as mold. Pieces or glue particles should not be aggregated into lumps, which indicates excessive humidity while in storage and negatively affects its quality. Dry collagen glue usually has an unpleasant smell — this is not an indication of poor quality.
Calculating the Ratio of Glue for Different Concentrations
Before preparing the required concentration of glue solution, it is necessary to calculate the quantity of each component. To calculate the concentration, we use an x-y diagram. Dry glue always contains a small amount of bound water, so its dry weight never equals 100%. The amount of bound water will vary depending upon the humidity of the environment but usually comprises 12–18% of its overall weight. In our calculations, we assigned it an average value of 15%; consequently, the dry glue is an 85% glue concentration and is recorded in the upper part of the x-y diagram as the initial concentration of the dry component of the glue solution. Water is considered to have 0% glue concentration and is noted on the right side as the initial concentration of the liquid component of the glue solution. In the center of the diagram, the value of the required glue concentration is indicated. The directions indicated by arrows are produced by subtraction to obtain the results shown in the diagram (Fig. 3) for a glue concentration of 15%, for example. For a quantity of dry glue (15–0=15 grams), add water (85–15=70 ml) to get the desired concentration of 15%.

Fig. 3. X-Y diagram to calculate a 15% glue concentration.
The diagram in Fig. 3 shows how to calculate the concentration using several required materials for the preparation of a fresh solution of glue. If the solution has already been prepared, introducing more of one of the components changes its concentration. If it is necessary to increase the concentration, add more dry glue. To decrease it, add water. Changing the solution concentration is also possible by mixing two solutions of different concentrations. Calculations for changing solution concentration are done in a like manner. Thus, for example, to obtain a 5% of solution from a 10% solution, the calculation appears in the second diagram. (Fig. 4) Since, in this case, it is necessary to dilute the more concentrated solution, for the initial concentration of the dry component, we write in the upper part of the diagram the concentration of the existing solution: 10%. On the right side, we write 0% for the concentration of water to be added, as in the preceding case. In the center, we place the value of the desired concentration—5%. We obtain 10–5=5 and 5–0=5. This means taking 5 grams of the 10% solution and adding 5 ml of water is necessary.

Fig. 4. X-Y diagram to calculate a 5% increase in glue concentration.
Sometimes you may need to make a solution more concentrated. In this case, adding a certain quantity of dry glue to the existing solution is necessary. Let's calculate a 10% solution from a 3% concentration. Since dry glue will be added to the solution, in the upper part of the diagram, we write the value of 85%. (Fig. 5) On the right side, we write the concentration of the existing solution — 3%. In the center, we note the required concentration of 10%. We obtain the results: 85–10=75 and 10–3=7. So, we must add 7 grams of dry glue to 75 ml of 3% solution to get a 10% solution.

Fig. 5. X-Y diagram to calculate an increase in glue concentration to 10%.
Very rarely will there arise the need to change the glue concentration by mixing two solutions of different concentrations. For example, how to obtain a 10% solution by mixing two solutions. To do so, it is necessary to take 8 ml of 15% solution and mix it with 5 ml of 2% solution. (Fig. 6)

Fig. 6. X-Y diagram to calculate a 10% glue concentration by mixing solutions of different concentrations.
Purifying the Glue
While making concentration calculations, it is essential to consider the following. If the glue used was not purified during the preparation of the glue solution. The solution should be filtered to remove impurities and undissolved particles of glue, which alter the ratio of components in the solution. For this reason, the actual concentration of glue solution obtained will be below that calculated. In icon-painting practice, such deviations are not critical, and some deviation from the calculated concentration will not cause a failure in the glue layer. Sometimes the need for precision in the glue concentration is nevertheless necessary. For example, the concentration of glue solution used in restoration work must be strictly observed.
Commercial firms producing glue usually do not clean the product sufficiently; therefore, glue contains foreign substances introduced during production. This does not imply these firms make inferior products, but simply that the producers make glue sufficiently pure for its primary purpose of gluing wood; therefore, the purity of glue corresponds to these basic requirements. For use in icons, painting glue needs to be purified.
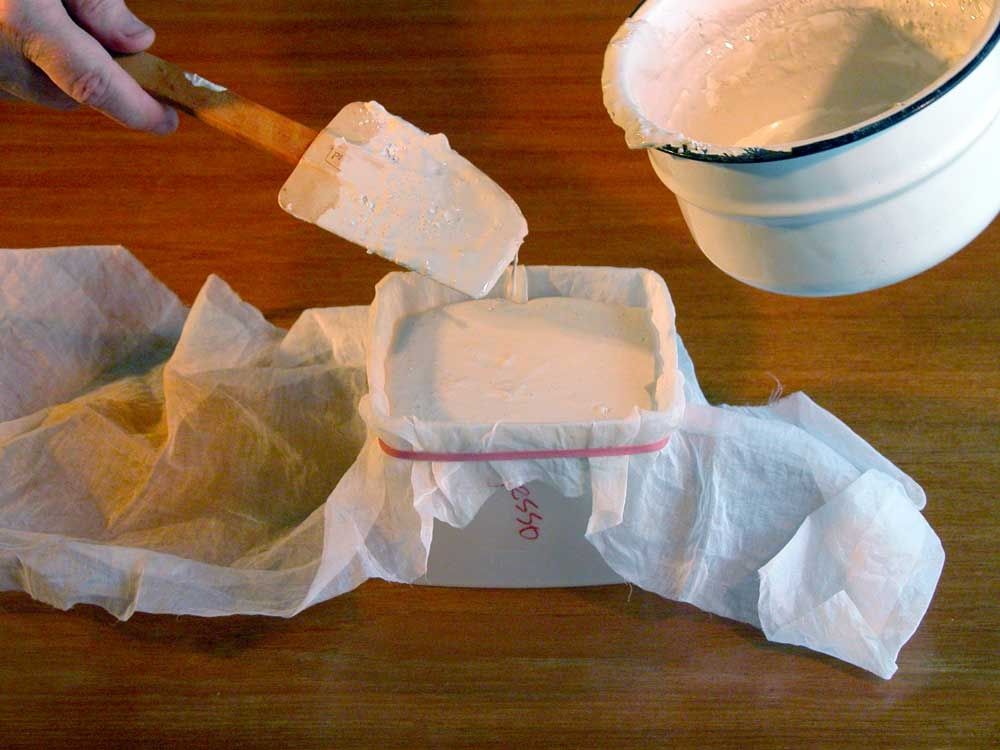
To purify the glue, place a quantity into a wide-mouth vessel and fill it with tepid water covering the glue granules. Leave the glue in the water for 12 to 14 hours to absorb water and begin swelling. The absence of a solid nucleus inside the glue particles indicates that the glue has stopped absorbing water and the swelling has ended. After swelling, gather the glue into small lumps and press them in your hands to make their mass more homogenous. The lumps dissolve more readily in warm water when pressed by hand. Place the container of glue solution in a water bath heated to 70º C. (158º F.), and mix it to attain a mass uniform in thickness and dissolution of small glue particles. Filter the solution through two layers of gauze and deposit it into a wide shallow container to thicken. The thickened glue can then be cut into approximately two by two centimeters (one-inch) square pieces and allowed to dry on a polyethylene film. Do not dry the glue pieces on glass or plastic since glue possesses high adhesive strength and can adhere to most smooth surfaces, making it very difficult to separate once dried. You can now use the glue pieces by preparing them as usual.
Using the calculation method described above, there is no need to purify the glue beforehand and still ensure precise conformity to the desired solution concentration. As mentioned above, in practice, it is rarely possible to prepare the correct ratio of components to achieve a glue concentration with a high degree of accuracy. Still, the mass ratios of the components can be frequently achieved by calculating the glue concentration. So, a 15% solution corresponds from one glue part to six water parts. A 10% solution corresponds from one glue part to five water parts. Calculating the ratios using the x-y diagram is the most practical solution. In this case, it is not necessary to purify the glue before making the solution since even without this process, it is possible to ensure the accuracy of concentration sufficient for practice.
Preparing the Glue Solution
Preparing the glue solution consists of the following: Calculate the amount of components used to achieve the required concentration. Weigh the necessary dry glue and place it into a glue pot like the one described in the preceding article. Fill the container with the desired amount of cold water. Dry glue swells in size while absorbing the required amount of water according to the calculation. The time required to swell and absorb water depends upon the sizes of the glue pieces and usually requires from 5 to 14 hours. After swelling, place the container in a heated water bath and periodically stir the solution to completely dissolve the swollen pieces of glue. The water bath temperature should be about 70º C. (158º F.). The process of dissolving the swollen glue particles slows down considerably at lower temperatures. The gradual destruction of glue molecules occurs at temperatures of 80º C. (176º F.) and above, resulting in the loss of its adhesive properties. The process is completed once all the glue pieces are entirely dissolved, and the solution has a uniform consistency. If necessary, filter the glue solution. It is now ready to use.
Sometimes it may be necessary to prepare the glue solution quickly. In this case, a simplified method of preparation can be used. For the sake of fairness, it is worthwhile to note that this method is relatively often used because of its simplicity and significant time-saving.
First, as usual, calculate glue concentration. Keep in mind that the optimum form of glue, in this case, is acceptable (0.2–0.5 mm) shavings or granules. Thick plates of glue are hardly suitable, and pieces greater than 3.0 mm are not suitable for this preparation method. After weighing the components, place the necessary quantity of water into a thin-walled vessel. The author has successfully used a laboratory flask with a volume of 500 milliliters for this task.
The container with water is preheated using an external heat source. The flame of an alcohol lamp or a gas range is best for this purpose. The heat from an electric coil or range is inconvenient and ineffective. Heat the water in the vessel until just before it begins to boil. The temperature of heated water at the first appearance of bubbles is usually 75° to 85° C. (167º to 185º F.). As bubbles begin to appear, remove the container from the flame. Take a portion of the weighed glue and place it into the vessel, shaking it vigorously with the water. After shaking the vessel, let it stand for about one minute, after which repeat the process until all the glue is dissolved in the solution. Adding the entire quantity of weighed glue in one step is undesirable since it will aggregate into a single lump, prolonging the time necessary to dissolve. While adding glue to the solution, do not heat it just before it begins to boil as described above, but keep it heated at a temperature close to 70° C. (158º F.). After preparation, filter the solution if the glue used was not previously purified. The glue solution can be used immediately to apply on the panel.
Bibliography
Alpatov, M. B., Early Russian Icon Painting, Moscow: Iskusstvo Publishers, 1974.
Ashok, Roy, Artists Pigments: A Handbook of Their History and Characteristics, Vol. 2, Washington, D.C.: National Gallery of Art, 1993, p. 203-205.
Dionysius, of Fourna, Paul Hetherington, trans., The Painters Manual of Dionysius of Fourna, Sagittarius Press, London, 1974. (Available from Natural Pigments)
Ramos-Poqui, Guillem, The Technique of Icon Painting, Search Press Ltd. and Burns & Oates Ltd., Tunbridge Wells, Kent, 1990. (Available from Natural Pigments)
Rice, David and Tamara Talbot, Icons and Their Dating: A Comprehensive Study of Their Chronology and Provenance, London: Thames and Hudson Ltd., 1974.
Toch, Maximilian, The Chemistry and Technology of Paints, New York: D. Van Nostrand and Co., 1925, p. 131.
The original text is written in Russian by Nesusviet.
© 2002 Iconofile. All rights reserved. Translated from Russian by Tatiana Zaytseva and George O'Hanlon.